1 Software
The central tool is obviously R, but its operation is today difficult to consider without its development environment RStudio. For source control, git and GitHub are the de facto standards. The set must be completed by a LaTeX distribution for the production of documents in PDF format. A bibliographic management tool is essential: Zotero and its extension Better BibTeX are perfectly adapted to the framework presented here. Finally, other software of more occasional use may be necessary, such as Go.
Their installation and coherent organization are presented in this chapter.
1.1 R
1.1.1 Installation
R is included in Linux distributions: the package is named r-base.
It does not contain development tools that are often needed, so it is better to install the r-base-dev package as well.
The version of R is often a bit old.
To get the latest version, you have to use a CRAN mirror as a source for the packages: see the full documentation for Ubuntu1.
On Windows or Mac, install R after downloading it from CRAN2.
1.1.2 Rtools
On Mac, the installation of R is sufficient from version 4.0.0.
On Windows, the installation must be completed by the “Rtools”, which contain the development tools, including those necessary to compile packages containing C++ code.
The path of the Rtools (before version 4.2) must be declared to R, by executing the following command in the RStudio console (adapted to version 4.0 of the Rtools):
# Rtools : path declaration,
# requires restarting RStudio
writeLines(
  'PATH="${RTOOLS40_HOME}\\usr\\bin;${PATH}"',
  con = "~/.Renviron"
)
Since version 4.2, this action is unnecessary.
The Rtools must be completed by some missing utilities, to be installed when the need appears (usually a warning from R that the software is not installed).
Package checking returns a warning if qpdf3 is not installed.
Download the zip file and paste the entire contents of the bin folder into the usr/bin folder of Rtools (C:\Rtools42\r\bin for version 4.2).
Another warning is returned if Ghostscript is not available.
Download and install it4.
Then copy the contents of the bin folder to the usr/bin folder of Rtools.
1.1.3 Update
It is recommended to use the latest minor version of R: for example, 4.0.x until the release of version 4.1. It is mandatory to use the latest version to prepare a package submitted to CRAN.
Important changes occur between major versions (version 4 does not allow to use a package compiled for version 3) but also sometimes between minor versions (a binary data file .rda saved under version 3.3 cannot be read by version 3.6).
It is therefore useful to update R regularly.
Installing a new version does not automatically uninstall older versions, which allows you to use more than one version if necessary (for example, if an old and essential package is no longer available). In common use, it is preferable to uninstall old versions manually after installing a new one.
1.1.4 Libraries
R packages are found in two folders:
- the System Library contains the packages that come with R: base, utils, graphics for example.
It is located in a subdirectory of the installation program (
C:\Program Files\R-4.1.0\libraryfor R version 4.1.0 on Windows 10). - The User Library contains those installed by the user.
Until version 4.1, it is located in the user’s home folder, in a subfolder
R\win-library\4.1\). Since version 4.2, this folder is in the user’s local settings, whose folder location is in the environment variable%LOCALAPPDATA%.
Until version 4.1, if the user’s home folder is backed up (for example, if it is replicated in the cloud by OneDrive on Windows), it is not optimal to place the packages there: the traffic generated by backing them up would be heavy and unnecessary. In order for packages to be installed automatically in the system library, the user must have the right to write to it. On Windows, give the computer’s user group the “Modify” permission to the library folder, in addition to the default read permissions. From version 4.2 onwards, there is no reason to change the default operation: local settings are not saved.
If the user library is selected, you must remember to empty the folder corresponding to the old version of R in case of minor version change.
The location of the libraries is given by the function .libPaths():
## [1] "/Users/runner/work/_temp/Library"
## [2] "/Library/Frameworks/R.framework/Versions/4.5-arm64/Resources/library"
1.2 RStudio
RStudio is a graphical interface for R and much more: it is designed to simplify project management, make writing and publishing documents easier and integrate source control for example.
1.2.1 Installation
Install the latest version of RStudio Desktop from the RStudio website5.
A command is available in the “Help” menu of RStudio to check for a more recent version to install.
1.2.2 File encoding
The files manipulated in R are mostly text files. Special characters, especially accents, can be encoded in various ways, but the encoding declaration is not integrated in the files. The default encoding depends on the operating system, which regularly causes problems with the readability of shared files. The UTF8 encoding has become the standard because it is universally recognized and supports all alphabets without ambiguity.
The first time you use RStudio, create a new R file (“File > New File > R Script” menu), save it in UTF8 format (“File > Save with Encoding…”), choose UTF8 in the list of formats and check the box “Set as default encoding for source files”. Delete the file after saving it.
New files will be encoded in UTF8 format. Files encoded in another format will not be displayed correctly: they can be reopened with their original encoding (“File > Reopen with Encoding…”), possibly trying several encodings until they are displayed correctly, and then saved in UTF8 format.
1.2.3 Working folder
The default working folder is the user’s home folder, called ~ by RStudio:
Sys.getenv("R_USER")## [1] ""-
My Documentson Windows. -
Homeon Mac or Linux.
You should always work in subfolders of ~, for example: ~/Training.
For RTools to work properly, the full name of the working directory must not contain spaces (use underscores _) or special characters.
The current working directory is obtained by the command getwd().
getwd()Using source control (see chapter 3) creates many working files. Source-controlled projects should not be located in a folder that is already backed up by another means, such as a OneDrive on Windows, otherwise resources will be used excessively: each change validation generates a backup of the modified files, but also of the control files, which can be very large.
1.2.4 Solution chosen
The organization of the work environment is a personal matter, depending on the preferences of each individual. The organization proposed here is only a possibility, to be adapted to one’s own choices, but respecting the constraints mentioned.
On Windows, an optimal organization is as follows:
- In one’s personal folder (
My Documents,~for R), anRfolder is used for simple projects, without source control. The backup of this folder is managed elsewhere. - A folder outside the home folder is used for source-controlled projects.
The user must have the right to write to it.
In the Windows organization, the folder corresponding to these criteria is
%LOCALAPPDATA%, typicallyC:\Users\Name\AppData. The folder will therefore be%LOCALAPPDATA%\RProjects. To create it, runmd %LOCALAPPDATA%\RProjectsin a command prompt. Pin this folder to the quick access of the file explorer (figure 1.1): paste%LOCALAPPDATA%\RProjectsin the address bar of the file explorer, validate, then right click on “Quick Access” and pin the folder.
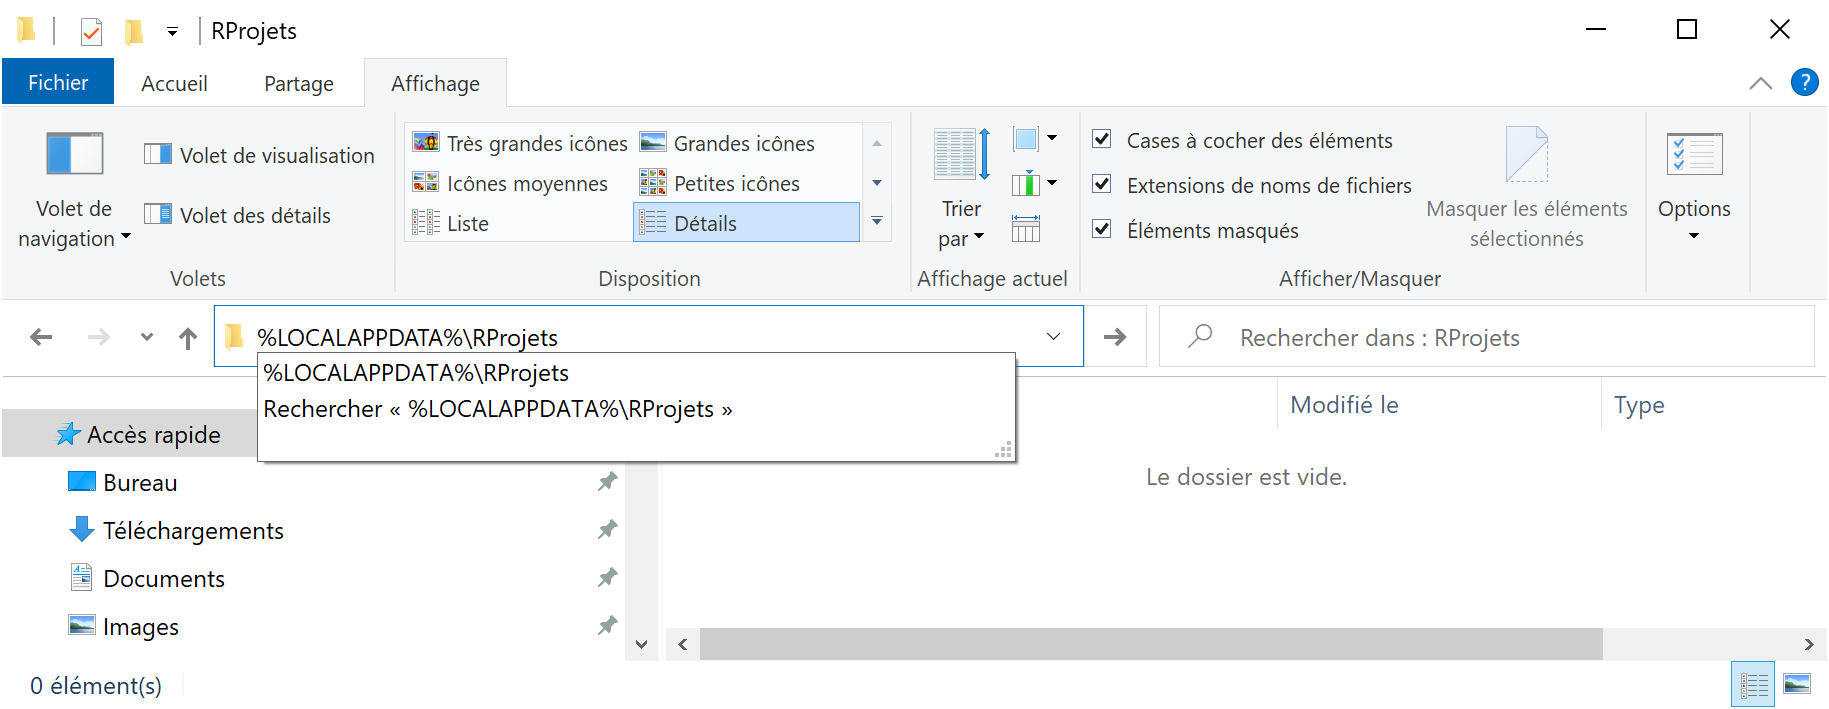
Figure 1.1: Folder for projects under source control, on Windows.
1.2.5 Character font
The Fira Code6 font provides ligatures: the “<-” characters used for assignment in R, for example, are displayed as an arrow. To use it in the RStudio editor, simply install it according to the instructions for your operating system and declare it in the global options (“Tools > Global Options…” menu): select Appearance and the option Editor Font: Fira Code.
1.3 Packages
1.3.1 Installation from CRAN
The classic installation of packages uses CRAN. There is an “Install” button in the Packages window of RStudio.
Packages are uploaded to CRAN by their authors as source code, compressed in a .tar.gz file.
They are available for download as soon as they are validated.
They must then be put in binary format for Windows (in a `.zip’ file), which takes some time.
When asked to install a package on Windows, CRAN proposes the source version rather than the binary version if it is more recent (figure 1.2).
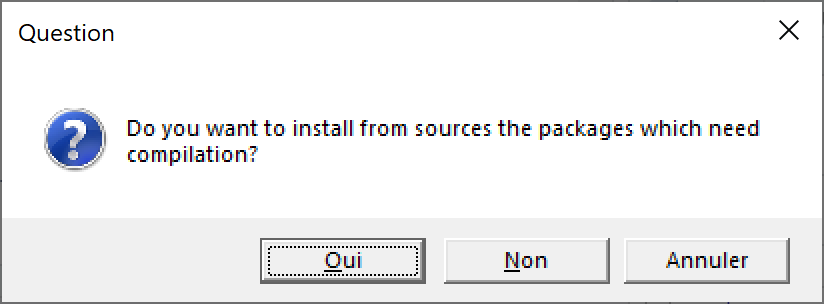
Figure 1.2: Choice of the version of the packages to install.
The list of packages concerned is displayed in the console, for example:
  There are binary versions available but the source
  versions are later:
              binary   source needs_compilation
boot          1.3-24   1.3-25             FALSE
class         7.3-16   7.3-17              TRUE
Some packages require compilation (column needs_compilation), usually because they contain C++ code.
They can only be installed by Rtools.
The installation of packages in source version is much longer than in binary version. Unless a specific version of a package is needed, it is better to refuse the installation of source versions.
Packages can be updated a little later, after they have been compiled by CRAN.
The “Update” button in the RStudio Packages window allows you to update all installed packages.
1.3.2 Installation from GitHub
Some packages are not available on CRAN but only on GitHub because they are still under development or because they are not intended to be widely used by the R user community. It can also be useful to install a development version of a package published on CRAN for a specific use like testing new features.
The installation is handled by the remotes package.
The build_vignettes argument is needed to create the vignettes of the package.
remotes::install_github("EricMarcon/memoiR", build_vignettes = TRUE)The package name is entered as “GitHubID/PackageName”.
The installation is done from the source code and therefore requires the Rtools if a build is needed.
install_github() checks that the version on GitHub is more recent than the version installed on the workstation and does nothing if they are identical.
1.3.3 Installation from Bioconductor
Bioconductor is a complementary platform to CRAN that hosts packages specialized in genomics.
Installing packages from Bioconductor requires the BiocManager package for its install() function.
The first argument of the function is a vector of characters containing the names of the packages to be installed, for example:
BiocManager::install(c("GenomicFeatures", "AnnotationDbi"))The install() function called without arguments updates the packages.
1.3.4 Selected solution
At each minor update of R, all packages must be reinstalled.
The most efficient way to do this is to create a Packages.R script to place in ~\R.
It contains a function that checks if each package is already installed so that it is not redone unnecessarily.
# Install R packages ####
install_packages <- function(packages) {
  install_package <- function(package) {
    if (!package %in% installed.packages()[, 1]) {
      install.packages(package, repos = "https://cran.rstudio.com/")
    }
  }
  invisible(sapply(packages, install_package))
}

# Development tools ####
install_packages(
  c(
    # Development tools. Import remotes, etc.
    "devtools",
    # Run Check by RStudio
    "rcmdcheck",
    # Formatting R code (used by knitr)
    "formatR",
    # Documentation of packages in /docs on GitHub
    "pkgdown",
    # Bibliography with roxygen
    "Rdpack",
    # Performance measurement
    "rbenchmark",
    # Automatic package documentation
    "roxygen2",
    # Package testing
    "testthat"
  )
)

# Markdown ####
install_packages(
  c(
    # Knit
    "knitr",
    # Complex markdown documents
    "bookdown",
    # Websites
    "blogdown",
    # Document templates
    "memoiR"
  )
)

# Tidyverse ####
install_packages("tidyverse")
The last part of the script is to be completed with the packages used regularly.
This script is to be executed each time R is updated, after having activated the right to write in the system library if needed (see section 1.1.4).
1.4 git and GitHub
1.4.1 git
git is the source control software used here. Its use is detailed in the chapter 3.
For Windows and Mac, the installation is done from the git website7.
git is integrated in Linux distributions.
For Ubuntu, the apt package is git-all.
git is installed without a graphical interface, provided by RStudio.
In RStudio, modify the global options (menu “Tools > Global Options…”). Select Terminal and the option New Terminals open with: GitBash.
Check that git is installed correctly by typing the command git -h in the RStudio terminal: help should be displayed.
After installing git, the RStudio terminal may not work properly and return an error message containing the following:
*** fatal error - cygheap base mismatch detected
This problem is probably due to using incompatible
versions of the cygwin DLL.
The error message is inaccurate: the library that should only exist in one copy is not cygwin1.dll but msys-2.0.dll.
Look for this file in the git and Rtools installation folders.
They are normally found in usr/bin.
Replace the git one by the Rtools one: the version of the two files must be identical.
Enter your credentials by running the following commands in the terminal:
git config user.name
git config user.email
The user name is free, preferably “FirstName LastName”.
1.4.2 GitHub
GitHub is the platform accessible through a website that allows to share the content of git repositories. To use it, you just have to open an account with the same email address as the one registered in git.
The name of the GitHub account is noted here GitHubID. Each GitHub account allows to host repositories (a repository contains the files of a project) at the address https://github.com/GitHubID/RepoID8. Each repository can have a website at https://GitHubID.github.io/RepoID/9. Finally, a global web site is provided for each user at https://GitHubID.github.io/10.
1.4.3 SSH authentication
Communication between git (installed on the local computer) and GitHub (online platform) requires authentication.
Two methods are available: HTTPS (also known as SSL) and SSH. SSH is the most robust, but requires the creation of a private key.
Display RStudio’s global options (“Tools > Global Options…” menu): select Git/SVN then click on the “Create SSH Key…” button and choose the “ed25519” key type. You can add a password (passphrase) to the key, which must be typed in the first time each session is used. If the computer is properly secured (no physical access by third parties), leaving it empty will increase fluidity.
The private key is stored in the `.ssh’ folder of the user’s home directory. The corresponding public key must be uploaded to GitHub: click on the “View public key” link and copy the key to the clipboard.
On GitHub, display your account settings (“Settings” menu), select “SSH and GPG Keys”, click on “New SSH Key” and paste the public key into the “Key” field. Give the key a name in the “Title” field. The name can be that of the computer on which the key was created.
Warning: the private key is strictly confidential and must not be copied anywhere where it could be read by a third party (be careful with automatic backups in particular). It does not need to be backed up: if lost, it can be easily replaced. The key must not be copied to multiple computers: if necessary, create a new key on each workstation used.
In the RStudio terminal, check that the key is working properly:
ssh -T git@github.comIf successful, a message will indicate that the authenticity of the GitHub server cannot be verified: a manual check is required for the first connection.
Check with GitHub that the server fingerprint is correct11 and type yes.
The server is automatically added to the list of known servers in the known_hosts file.
If the key is compromised (lost or the computer containing it is loaned to someone else), delete it from GitHub and create a new one.
1.4.4 Obtaining a personal access token
HTTPS authentication is the alternative to SSL authentication: choose a method and stick to it afterwards. To use HTTPS authentication, the creation of a personal access token is required.
Tokens are created on GitHub, in the settings of one’s user account, in “Developer Settings > Personal Access Tokens”12.
Generate a new token, describe it as “git-RStudio” and give it “repo” permission, i.e. modify all repositories (it is not possible to limit access to a particular repository). The token is a string that cannot be read later: it must be saved as a password.
1.5 LaTeX compiler
To produce documents in PDF format, a LaTeX distribution is needed. The light solution is to install the tinytex package which in turn installs a LaTeX distribution optimized for R Markdown.
A full distribution allows the use of LaTeX beyond RStudio but is useless if the use of LaTeX is limited to knitting R Markdown documents. MiKTeX is a very good solution for Windows and Mac.
1.5.1 tinytex
Install the package and run it:
install_tinytex()Adding LaTeX packages not included in the minimal starting distribution is automatic but can be slow.
The distribution can be updated by the command:
tinytex::tlmgr_update()1.5.2 MiKTeX
1.5.2.1 Installation
Download the installation file13 and run it. There are several choices to make during the installation:
- Install the program for all users (with administrator rights).
- The default paper size: choose A4.
- The installation mode of the missing packages: choose “Always Install” so that they are downloaded automatically if needed.
For Linux, follow the instructions on the MiKTeX website.
1.5.2.2 Updates
MiKTeX is installed with the most used LaTeX packages. If a document needs a missing package, it is loaded automatically. Package updates should be done periodically with the MiKTeX console, accessible from the Start menu.
When launched without elevation of privileges, the console offers to switch to administrator mode. Click on “Switch to Administrator mode”.
In the settings, check that the packages always install automatically and that the paper size is A4.
In the “Updates” menu, click on “Check for updates” then “Update now”.
If the automatic installation fails, it is possible to manually install a package in the “Packages” menu.
1.6 Zotero
Zotero14 is the most used bibliographic management software. Its extensions allow you to complete its functionalities according to your needs. Better BibTeX allows you to export and maintain a selection of bibliographic references (a Zotero collection) as a BibTeX file in an R project, where it can be used in writing documents or documenting packages.
Download the installation file and run it. Create a user account on the Zotero website. Link the local installation to the account: in the “Edit > Preferences” menu, select “Sync > Settings” and authenticate in the “Data Syncing” area. Then check the box “Sync automatically” but not “Sync full-text content” because the total size of full text synchronized in this way between the online Zotero account and the workstation is limited to 300 MB.
Download the Better BibTeX extension15 and install it with the “Tools > Add-ons” menu: click on the settings button at the top right of the window, then “Install Add-on From File…” and select the file just downloaded.
Set up Better BibTeX from the menu “Edit > Preferences > Better BibTeX”. The options to modify are the following:
- “Citation Keys > Citation Key Format”:
auth:capitalize+yearso that citations have a unique identifier of the form “Name2021”. - “Citation Keys > Keep citation keys unique”: “across all libraries” so that citation identifiers are not ambiguous.
- “Export > Fields > Fields to omit from export”: “abstract, file” to avoid generating bibliographic files overweighted by useless information in R projects.
It is recommended to use the ZotMoov16 extension to better control the location of the full text (PDF files linked to bibliographic references). Install it, then set its parameters in “Edit > Settings”, “ZotMoov”. Choose the folder for storing full-text files in “Directory to Move Files To”. If the user’s personal folder is backed up (for example, if it is replicated in the cloud by OneDrive on Windows), placing this storage folder there enables the full-text files to be backed up and accessed from several workstations or directly online. This solution is much more efficient than Zotero’s default synchronisation, which is limited in volume.
Then select the download folder in “Source Folder for Attaching New Files”. The “ZotMoov: Attach New File” context menu will then automatically link the last file downloaded to the chosen reference.
Finally, in Zotero’s advanced options (“Edit > Settings”, “Advanced”), choose the base folder for linked attachments: this must be the same as the one chosen for storing full-text files.